When working with a Raspberry Pi, upgrading your SD card to a larger capacity is a common task, especially as your projects grow in scope and require more storage. However, reinstalling services and reconfiguring settings can be time-consuming. In this guide, I’ll show you how to transfer your data from a smaller SD card to a larger one step-by-step without losing any configurations or services.
Why upgrade microSD card?
In my case, I was using a 32GB microSD card with my Raspberry Pi, which hosted several critical services, including a LAMP server, Zabbix monitoring tools, the NX Witness NVR service, and the UniFi controller for my Ubiquiti devices. Additionally, I had developed a service bot to notify me about power outages and track their duration.
Over time, I realized that 32GB of storage was insufficient for my growing needs. To address this, I decided to upgrade to a 128GB microSD card while ensuring all my services remained fully operational and unchanged.
What you’ll need
- Your Raspberry Pi with the current microSD card (in my case – 32Gb)
- A larger microSD card (in my case 128Gb)
- A computer with an microSD card reader or external USB card reader
- Software tools:
dd(Linux/macOS) usually preinstalled
Back Up Your Data from the Old SD Card
Switch folder to work folder. I created folder “RPI” and go there. After it insert your current SD card into card reader and identify it using command lsblk
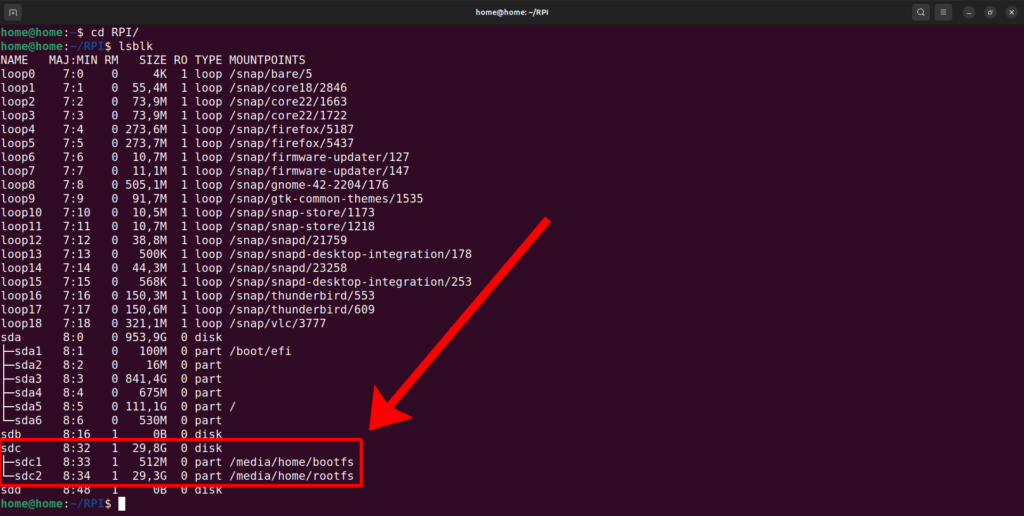
In the list of devices I see microSD card which idetifyed as sdc. Remember it.
Run dd command with sudo permissions to start copy data from microSD card /dev/sdX to the folder RPI by the next command
sudo dd if=/dev/sdc of=raspberry_backup.img bs=4M status=progressThis process copies data sector by sector while preserving the original structure, making it a time-consuming operation. For example, copying 32GB took approximately 10 minutes at an average speed of 53 MB/sec. Once the process is complete, you will have a new file named raspberry_backup.img.

So now we have image of the whole microSD card. Safely eject the card.
Prepare the New SD Card
Insert the new 128GB SD card into your computer, identify its name like I described above using LSBLK command and write the backup image. In my case new MicroSD card got the same name /dev/sdc.
sudo dd if=raspberry_backup.img of=/dev/sdc bs=4M status=progressThis process also took 10 minutes. Safely eject the card and insert it to the Raspberry Pi.
Resize the file system on the new microSD Card
Boot your Raspberry Pi with the new SD card. All services rise UP. I use Raspberry Pi Connect service so after successfully connecting firstly I determine free space and structure of the new SD card using command df -h

You can see, that size of structure still from the old card, but real size of the new card is 128 gb. We need to extend filesystem space to fit all SD capacity. by running command with sudo permissions:
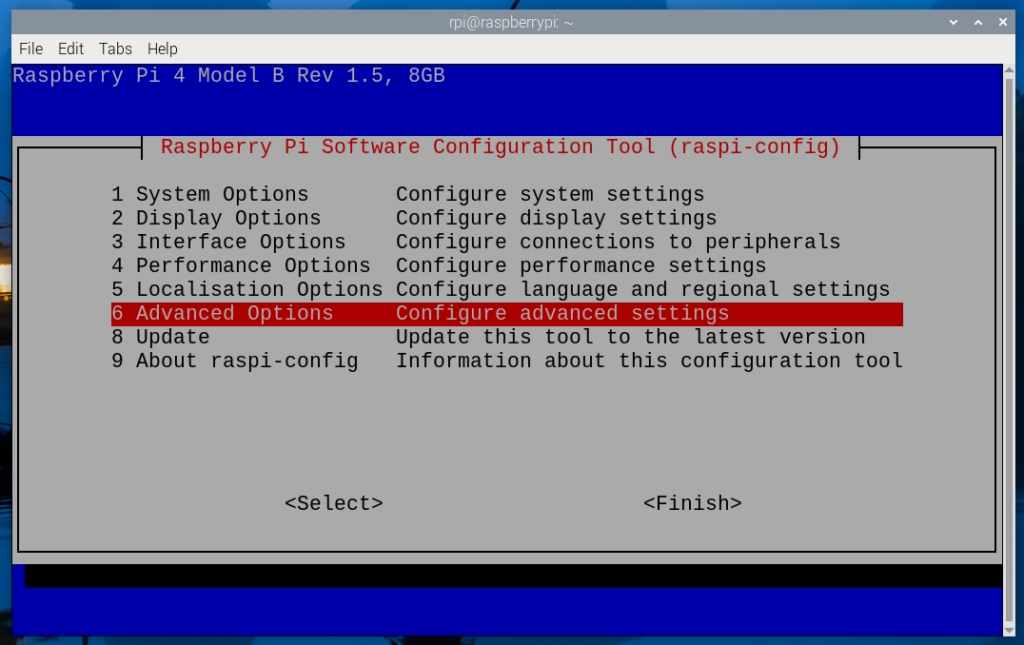
sudo raspi-configYou can see configuration screen. Select Advanced Options.
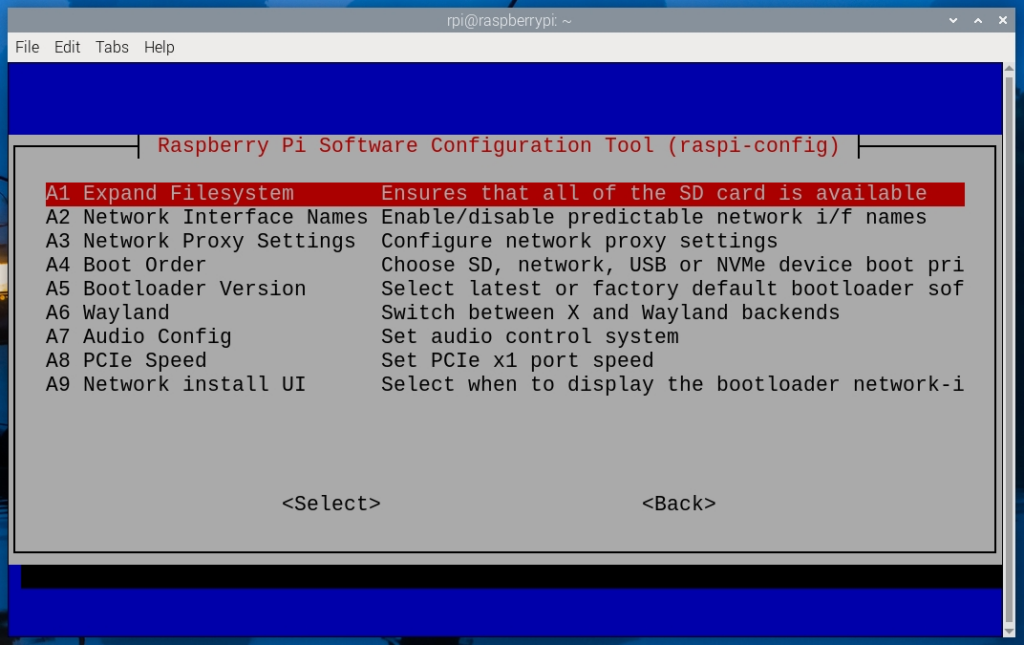
Then select Expand Filesystem menu
After several seconds you have got message about success
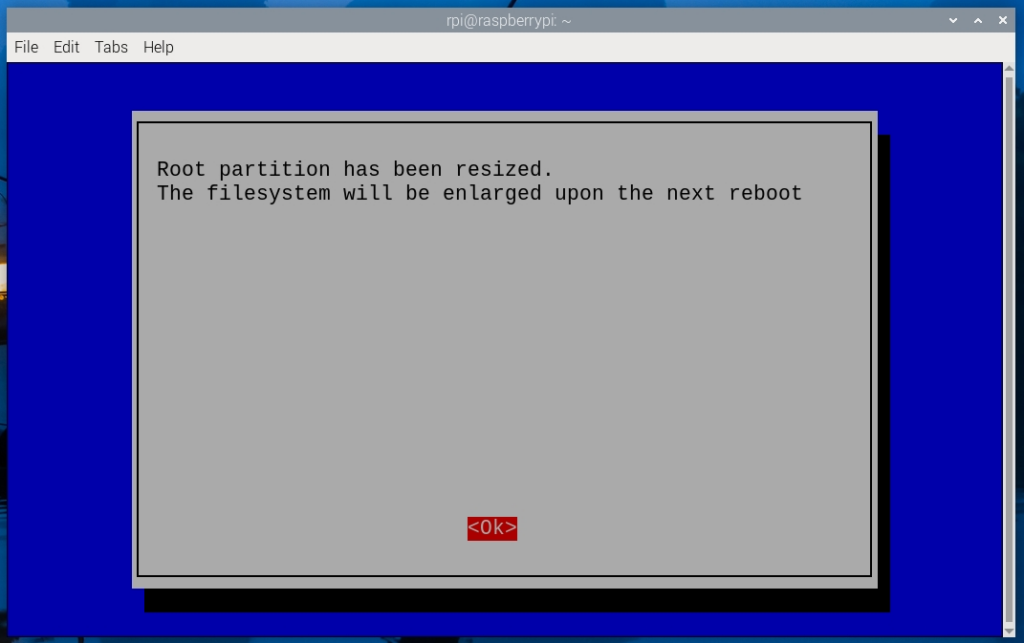
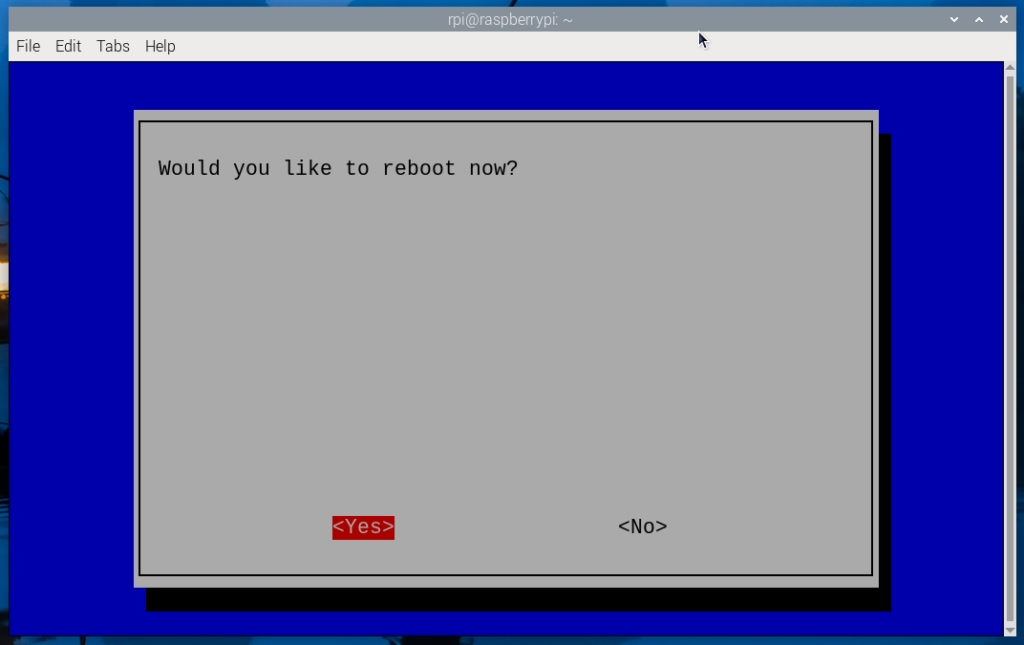
This action will take effect after reboot. So clock OK and then Back. In the final screen click YES to reboot Raspberry Pi.
Verify Everything Works
After the reboot, check SD card partition was resszed by using df -h command.

In this picture we see, that Size of the root directore was extended from 29G (32Gb) to 115G (128Gb). After this action I checked all services and saw, all services are enabled and in Active state.
Conclusion
Upgrading your Raspberry Pi’s SD card doesn’t have to be daunting. By carefully creating a disk image, writing it to the new card, and resizing the filesystem, you can seamlessly expand your storage without the need to reinstall or reconfigure your services.
If you have any questions or tips for improving this process, feel free to leave a comment below!


