Every WordPress site owner eventually faces the challenge of optimizing load speeds. In this article, I’ll share my personal experience of how I permanently fixed the critical “You should use a persistent object cache” warning in the Site Health section.
Introduction
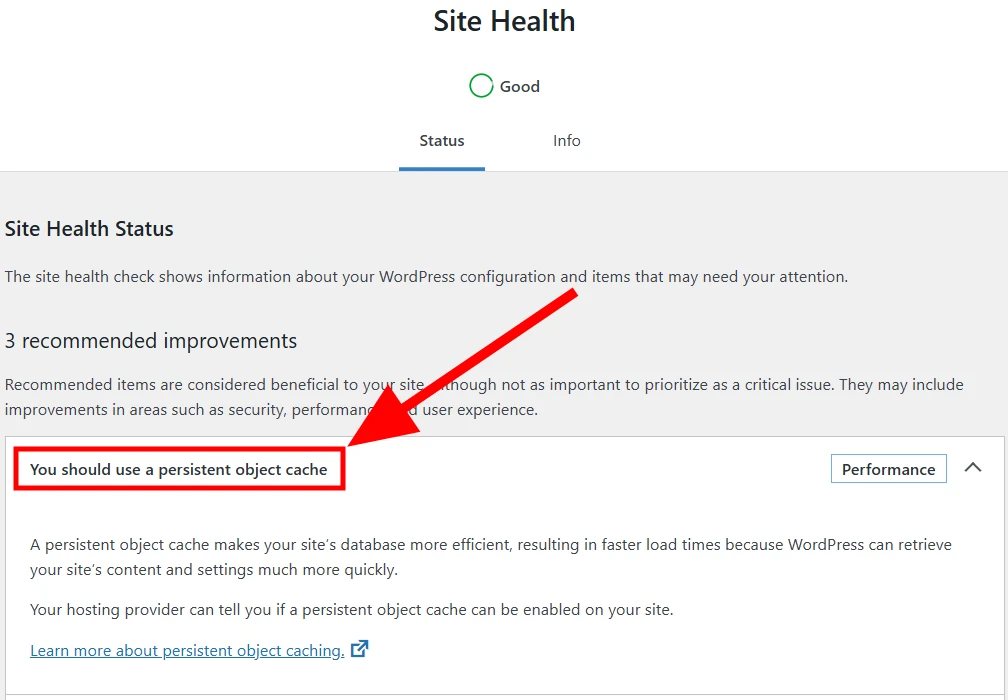
Recently, while checking my site’s health, I noticed a WordPress recommendation to use object caching. The issue is that without such a cache, WordPress is forced to query the MySQL database every time a page loads to retrieve settings, metadata, and posts. This creates unnecessary overhead and slows down the server’s response time.
Since my WordPress setup runs in Docker containers, I decided that the most logical step was to launch Redis as a separate service within the same network. This allowed me to move “heavy” queries from the disk to RAM, making the site—and especially its admin panel—much more responsive and pleasant to use.
Preparation
To integrate Redis into WordPress within a Docker environment, I had to complete several key steps. Since standard WordPress images do not include the necessary tools for Redis at the PHP core level, we first need to create a custom container build. Then, we will add the new service to our infrastructure, configure WordPress itself to use the cache, and verify the results via the console and the plugin dashboard.
PhpRedis Extension
The official wordpress:fpm-alpine image I use is highly optimized and lightweight, meaning it lacks the Redis extension. To fix this permanently, I created a Dockerfile in my project folder with the following code:
FROM wordpress:fpm-alpine

RUN apk add --no-cache $PHPIZE_DEPS pcre-dev \
    && pecl install redis \
    && docker-php-ext-enable redis \
    && apk del $PHPIZE_DEPS pcre-dev
By doing this, the PhpRedis extension (written in C) is compiled directly into the WordPress core, which is significantly faster than using standard PHP-based libraries.
I previously described how to set up and run WordPress in a Docker container in my earlier article: How to Migrate WordPress to Docker on a Raspberry Pi, which also includes the general docker-compose.yml code.
Before building, we need to edit the docker-compose.yml file to add the Redis service and instruct WordPress to use our custom build:
...
  redis:
    image: redis:alpine
    container_name: ostrich_redis
    restart: unless-stopped
    networks:
      - ostrich_net
  wordpress:
    build: .
    depends_on:
      - db
      - redis
...
To apply these changes, I rebuilt the containers using the following command:
docker compose up -d --build[+] Building 42.3s (8/8) FINISHEDAt this stage, the container already includes the PhpRedis extension. Now, it’s time to configure WordPress itself.
Connecting Redis
Launching the container is a great start, but we must inform WordPress that Redis exists and should be utilized. It is best to apply these changes before installing the plugin. A plugin cannot connect to a Redis container if it doesn’t know where to look. Adding the configuration directly to wp-config.php is the standard WordPress approach, ensuring no validation errors within Docker.
The wp-config.php file is located in your mounted Docker directory. To configure the connection, add the Redis definitions before the line /* That's all, stop editing! Happy publishing. */:
define( 'WP_REDIS_HOST', 'ostrich_redis' );
define( 'WP_REDIS_PORT', 6379 );
define( 'WP_CACHE', true );
These changes take effect immediately upon the next site visit, as WordPress automatically re-reads this file for every request.
The Redis Object Cache Plugin
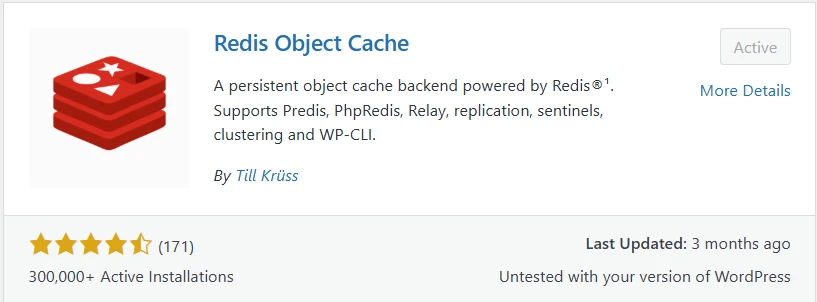
The Redis Object Cache plugin (by Till Krüss) is the industry standard for integrating WordPress with Redis. Unlike bloated “all-in-one” caching plugins, it serves one specific purpose: it installs a special drop-in file, object-cache.php, into the /wp-content/ folder. This file intercepts standard WordPress database queries and redirects them to the Redis memory. It is a lightweight, stable solution that supports the PhpRedis extension for maximum speed and includes built-in safety mechanisms to prevent site crashes if the Redis server becomes unavailable.
To install and activate the plugin:
- Log in to your WordPress Admin dashboard.
- Search for Redis Object Cache, install, and activate it.
- Go to the plugin settings page and click “Enable Object Cache”.
- The status should change to Connected.
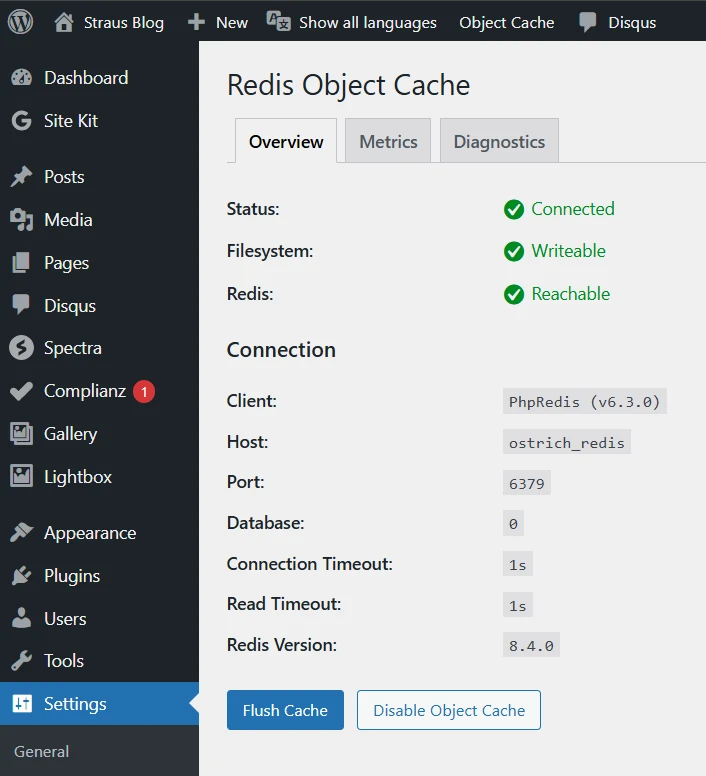
Verifying the Setup
If the plugin shows that the connection is established and the Redis instance is reachable, the connection is successful. However, you can perform additional server-side checks:
Check Redis status:
docker exec -it ostrich_redis redis-cli ping
PONG
Check PHP module presence:
docker exec -it ostrich_wp php -m | grep redis
redis
Once active, the plugin begins collecting statistics, which can be viewed under the Metrics tab.

Conclusions
This was a great optimization experience. Not only did I get rid of the WordPress warning, but I also made my technology stack more professional. Using Redis in Docker allows my site to run faster, consume fewer database resources, and handle traffic spikes more easily. If you use Docker for your projects, I highly recommend trying this method—it’s well worth the effort!