
Email security and protecting your domain from spoofing is a fundamental task when administering any infrastructure. After successfully configuring SPF and DKIM records, the next logical step is implementing a strict DMARC policy. However, your inbox quickly starts filling up with technical emails from various providers. In this article, I will show you how to use Cloudflare DMARC Management to get rid of the routine manual parsing of “raw” XML data and set up convenient visualization for these reports.
Email Report
I regularly receive DMARC reports because the DNS records for my domain, ostrich.kyiv.ua, have a DMARC record configured with the tag rua=mailto:[email protected].
The email contains a report archive named google.com!ostrich.kyiv.ua!1782086400!1782172799.zip, which in turn contains an XML file with the exact same name: google.com!ostrich.kyiv.ua!1782086400!1782172799.xml.
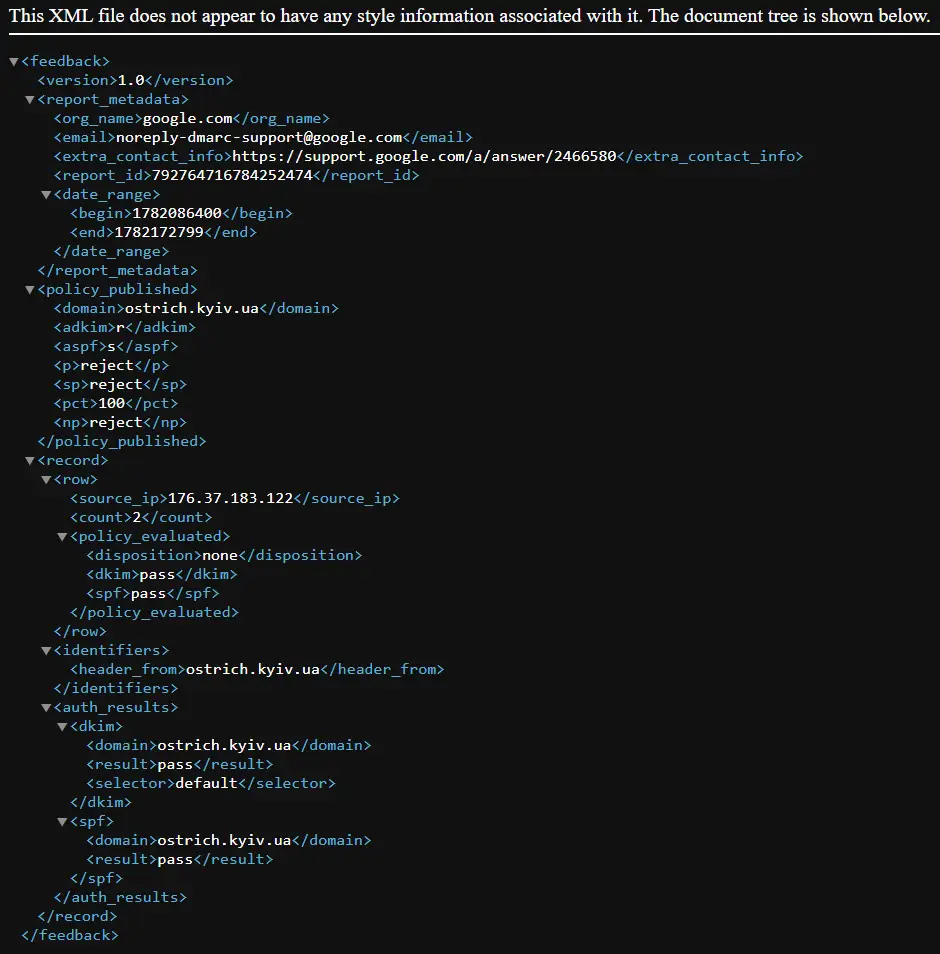
Since these emails arrive regularly, it is physically impossible to process them manually. This is where the Cloudflare DMARC Management service comes to the rescue.
Since these emails arrive regularly, it is physically impossible to process them manually. If you are running your own mail infrastructure, managing the backend is just as important; check out my guide on configuring PostfixAdmin to manage mailboxes to keep your mail system structured.
Automating DMARC Reports
Since I already use Cloudflare, enabling DMARC Management (DMARC Analytics) will only take a few minutes. The service automatically generates a unique email address where email providers will send these XML reports, and Cloudflare will transform them into convenient and easy-to-understand charts.
Since I already use Cloudflare, enabling DMARC Management (DMARC Analytics) will only take a few minutes. I rely heavily on this provider for security, which I also detailed in my experience of repelling a DDoS attack from Russia using Cloudflare.
Enabling DMARC Analytics
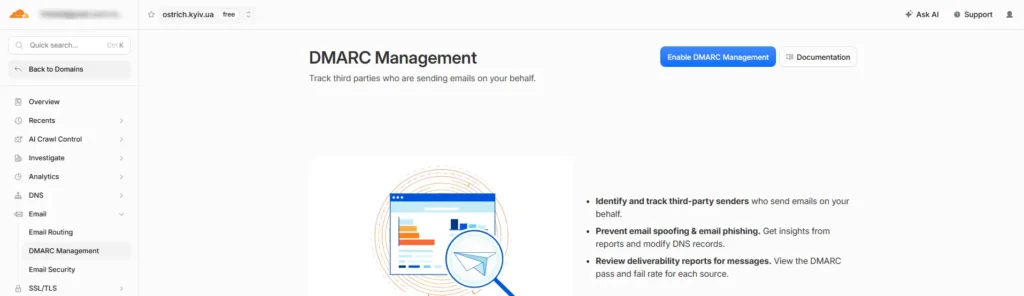
- Log in to your Cloudflare account.
- Select your domain from the list.
- In the left sidebar, navigate to Email -> DMARC Management.
- Click the Enable DMARC Management button.
Getting the Unique Cloudflare Address
The Configure DMARC records page will display your current DNS record and the newly generated one. You need to review these records and proceed with the setup by clicking the Next button.
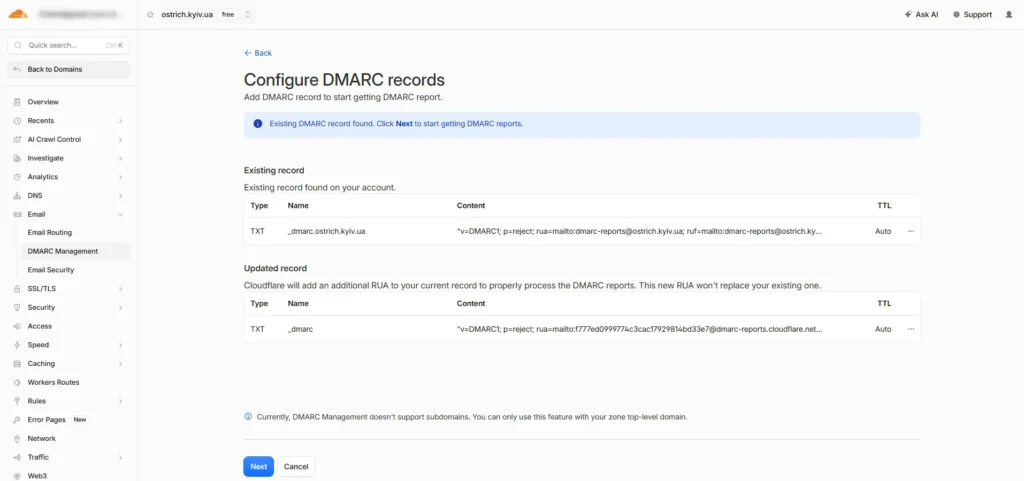
Cloudflare will add an additional RUA to your current record to properly handle DMARC reports. This new RUA will not replace your existing one.
The next page will display a block with DMARC settings and the report itself.
DMARC Management
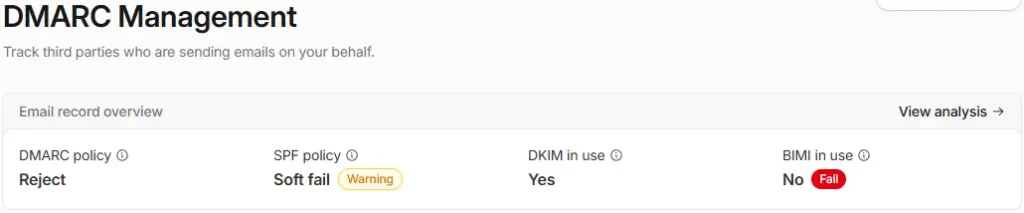
The DMARC Management page will show a table with the following settings:
- DMARC policy – Reject
- SPF policy – Soft fail (warning)
- DKIM in use – Yes
- BIMI in use – No (Fail)
The report will be empty initially since no emails have been sent yet. However, I will post a screenshot once there is something to show on the chart.
Visualizing DMARC Reports
Over time, a chart will be generated in the Email volume block. Since my email activity is not very high, I received the first results after about 24 hours.
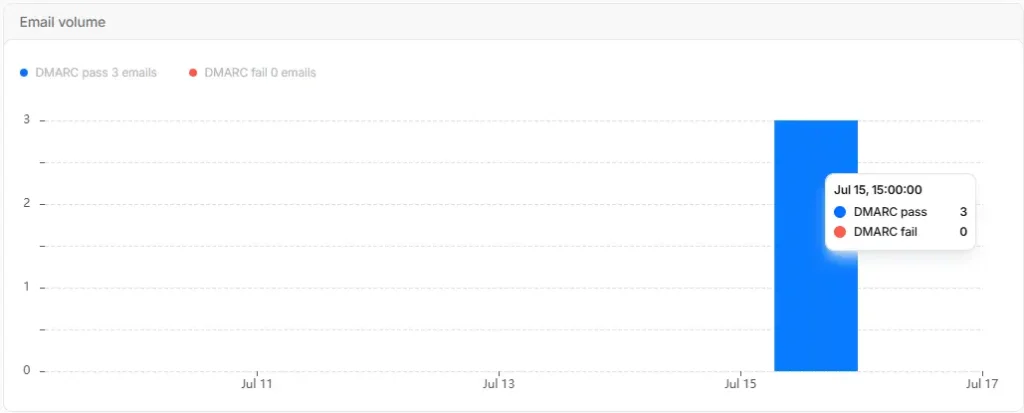
The chart displays the number of successful and failed email delivery attempts.
This report displays a table showing that emails are being sent through my network, and the subsequent columns show the status of the DMARC, SPF, and DKIM validation checks. If you want to monitor other mail activities directly inside your infrastructure, see how to set up monitoring Postfix activity by Zabbix.
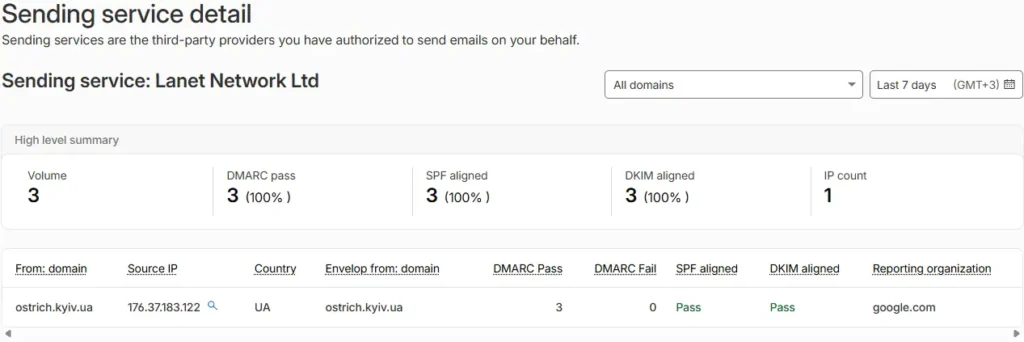
The second block is DMARC reports, which indicates which mailing services are sending emails on my behalf.

This report displays a table showing that emails are being sent through my network, and the subsequent columns show the status of the DMARC, SPF, and DKIM validation checks. My result indicates success.
If you click the link in the Sending service column, a more detailed report will be displayed on the Sending service detail page.
Conclusion
In conclusion, switching to Cloudflare DMARC Management is a “set it and forget it” solution that significantly simplifies email traffic monitoring. Instead of hoarding or ignoring daily XML archives, you get clear analytics of your domain’s health in a single interface. This approach allows you to keep your finger on the pulse: you will always see the actual volume of sent emails, the status of security checks, and immediately spot any unauthorized attempts to send emails on your behalf. Since this tool is free and requires only changing a single DNS record, I highly recommend enabling it for anyone who has already delegated their DNS zone management to Cloudflare.
Since this tool is free and requires only changing a single DNS record, I highly recommend enabling it. For further domain-level protection, you should also look into how domain name security works with DNSSEC.